The allure of ceramic coating—its unparalleled shine, hydrophobic properties, and long-lasting protection—is undeniable. While professional application yields the best results, the rise of consumer-grade ceramic coating kits has made it possible for dedicated DIY enthusiasts to achieve impressive results at home. It’s a meticulous process that requires patience, attention to detail, and the right environment, but the satisfaction of doing it yourself can be immensely rewarding.
This step-by-step guide will walk you through the process of Car paint protection emphasizing the critical preparation stages.
Phase 1: Preparation is Paramount (80% of the Work)
This phase is the most crucial. The ceramic coating will bond directly with your car’s clear coat. Any dirt, swirl marks, or imperfections left on the paint will be locked under the coating and magnified. Do not skip or rush any of these steps.
Tools & Materials for Prep:
- Two buckets with grit guards
- pH-neutral car shampoo (ceramic coating safe)
- Microfiber wash mitts
- Pressure washer or strong garden hose
- Iron remover spray (e.g., CarPro Iron X, Gyeon Iron)
- Clay bar and clay lubricant (quick detailer spray or specific clay lube)
- Rubbing alcohol (IPA – Isopropyl Alcohol 70% or higher) or a dedicated “prep spray” / “panel wipe” (e.g., Gyeon Prep, CarPro Eraser)
- Plenty of clean, high-quality microfiber towels (for drying and wiping)
- Paint Correction tools (optional but highly recommended for best results): Dual action (DA) polisher, various polishing pads (cutting, polishing, finishing), cutting compound, polishing compound.
- Good lighting (LED work lights are ideal to spot imperfections)
- Masking tape (painter’s tape)
- Gloves (nitrile)
Step 1: Thorough Wash (Decontamination Pre-Wash)
- Rinse: Thoroughly rinse the entire car with a pressure washer to remove loose dirt and debris.
- Foam Cannon (Optional but Recommended): Apply a thick layer of snow foam or pre-wash solution to dwell and loosen grime.
- Two-Bucket Wash: Using a pH-neutral car shampoo and two buckets (one for soapy water, one for rinsing your mitt), wash the car from top to bottom. Be gentle, never scrub.
- Rinse Thoroughly: Rinse off all soap residue.
Step 2: Iron & Fallout Removal
- Spray Iron Remover: While the car is still wet (or dry, depending on product instructions), spray the entire painted surface with an iron remover. It will react with iron particles (brake dust, industrial fallout) and turn purple or red.
- Dwell Time: Allow to dwell for 5-10 minutes (do not let it dry on the paint).
- Rinse Thoroughly: Rinse the car very well, ensuring no residue remains. This step is crucial for removing embedded contaminants that a regular wash can’t.
Step 3: Clay Bar Treatment
- Purpose: The clay bar removes stubborn, bonded contaminants that the iron remover might have missed (e.g., tar, tree sap, overspray, road grime) making the paint feel perfectly smooth.
- Working in Sections: Work on one panel at a time (e.g., hood, fender).
- Lubricate: Spray the clay lubricant generously on the paint surface.
- Glide the Clay: Gently glide the clay bar across the lubricated surface, applying minimal pressure. You’ll feel it grab initially, then glide smoothly as contaminants are picked up.
- Knead the Clay: As the clay picks up contaminants, knead and fold it to expose a clean surface. Discard if it becomes too dirty.
- Wipe: After claying a section, wipe away any residue with a clean microfiber towel.
- Repeat: Continue until the entire car feels perfectly smooth to the touch (the “glass test”).
Step 4: Paint Correction (Polishing – HIGHLY RECOMMENDED)
- Why it’s crucial: Ceramic coatings lock in whatever is underneath them. If you have swirl marks, light scratches, or dull paint, the coating will make these imperfections more visible. Polishing removes these defects.
- Process: This usually requires a dual-action (DA) polisher, cutting compounds, and polishing compounds.
- Compound (if needed): For heavier scratches.
- Polish: To remove swirl marks and refine the paint.
- Finish Polish: To maximize gloss.
- Learning Curve: Paint correction has a learning curve. If you’re new to it, watch extensive tutorials, practice on a scrap panel, or consider having this step professionally done even if you do the coating yourself.
- Masking: Use painter’s tape to mask off any plastic trim, rubber seals, or non-painted surfaces you don’t want to polish or coat.
Step 5: Final Decontamination (IPA Wipe / Panel Prep)
- Purpose: This step removes any polishing oils, wax, grease, or residue left from previous steps. The coating needs a completely clean, bare surface to bond effectively.
- Method: Spray a 70% (or higher) Isopropyl Alcohol (IPA) solution or a dedicated ceramic “prep spray” onto a small section of a panel.
- Wipe Immediately: Using two clean microfiber towels, wipe the area clean, turning the towels frequently. The first towel for removal, the second for final buffing.
- Repeat: Go panel by panel, ensuring the entire car’s paint is free of any residue. This will leave the paint feeling “squeaky clean” and looking dull (which is good, it means it’s bare).
Phase 2: Ceramic Coating Application
Now that your paint is surgically clean, you can apply the coating.
Tools & Materials for Application:
- Your chosen consumer-grade ceramic coating kit (follow its specific instructions)
- Applicator blocks and suede cloths (usually included in kits)
- Plenty of clean, high-quality microfiber towels (for buffing)
- Gloves (nitrile)
- Good lighting (critical for spotting high spots)
- A clean, dust-free, and well-ventilated indoor environment (garage is ideal)
Step 6: Apply the Ceramic Coating
- Work Indoors: Crucially, apply the coating in a clean, dust-free, and well-lit indoor environment, out of direct sunlight and wind. The temperature should be moderate (check product instructions).
- Small Sections: Work on small sections at a time (e.g., 2ft x 2ft or 60cm x 60cm). Do not try to coat an entire panel at once.
- Follow Product Instructions: Strictly adhere to your chosen ceramic coating kit’s specific instructions. Dwell times and application methods vary by brand.
- Application Method (General):
- Wrap a suede cloth around the applicator block.
- Dispense several drops of the ceramic coating onto the suede cloth (usually a line or several drops to prime it, then a few drops for subsequent sections).
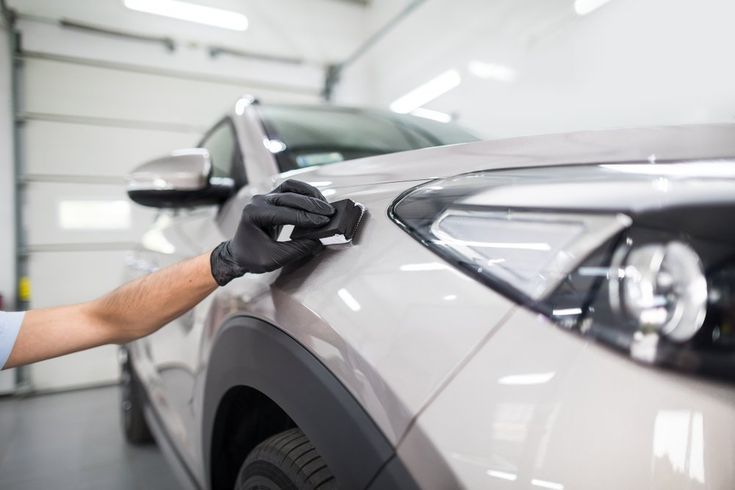
- Apply the coating to the small section using an even, overlapping pattern (e.g., cross-hatch: horizontal strokes then vertical strokes).
- Observe “Rainbowing”: As the coating flashes off, you’ll see a slight “rainbowing” or “sweating” effect on the surface.
- Dwell Time: Allow the coating to “dwell” or “flash” for the recommended time (this is crucial, usually 30 seconds to 2 minutes, depending on temperature/humidity). This is when it bonds.
- Buffing: Using a clean microfiber towel, gently wipe away the excess coating. Use a second, clean microfiber towel for a final buff to ensure no high spots (uneven, hazy areas) are left behind. High spots will be difficult to remove once cured. Use your light source to meticulously check from different angles.
- Repeat: Continue this process section by section until the entire painted surface is coated. Work methodically, ensuring no areas are missed.
Phase 3: Curing and Post-Application Care
Step 7: Curing Time
- Keep Dry: This is critical. After application, keep the car completely dry for the manufacturer’s recommended curing time, usually 24-48 hours, but sometimes longer. Avoid rain, dew, or any moisture.
- Avoid Washing: Do not wash the car or use any chemicals on it for at least 7 days (or as per manufacturer’s instructions) to allow the coating to fully harden and bond.
Step 8: Maintenance
- Gentle Washing: Once cured, wash your car regularly using a pH-neutral car shampoo specifically designed for ceramic-coated vehicles. Use the two-bucket method and soft microfiber wash mitts.
- Proper Drying: Always dry your car with clean, soft microfiber towels to prevent water spots.
- Ceramic Boosters (Optional): Many manufacturers offer “booster” sprays that can be applied every few months to replenish hydrophobic properties and extend the coating’s life.
Ceramic coating your car at home is a rewarding project that can deliver professional-level results if you commit to the meticulous preparation and precise application. Patience and attention to detail are your best tools for achieving that ultimate, long-lasting shine and protection.


